Building Your Own Keys · Volume 1
Building Your Own Keys — Vol 1: A Key from Almost Nothing
A Morse key is the most buildable instrument in radio — a lever, a contact, a spring, and a base. Here is how to make one from a hacksaw blade or a block of brass, and the handful of choices that decide whether it feels good.
1.1 The most buildable thing in the shack
Of all the gear in amateur radio, a Morse key is the one you are most likely to be able to make yourself, at the kitchen table, from scraps. It is, at heart, a switch you operate with your hand — a lever that closes a contact, a spring that opens it again, and a base to hold it all still. There is no firmware, no calibration, nothing to align. That simplicity is why homebrew keys are a beloved corner of the hobby, and why a hand-made key can be every bit as good to send with as a factory one — sometimes better, because you tuned every part of it to your own hand. This dive is about making them. (These example builds are from the wider CW homebrew community; I’ve held slots open for my own.)
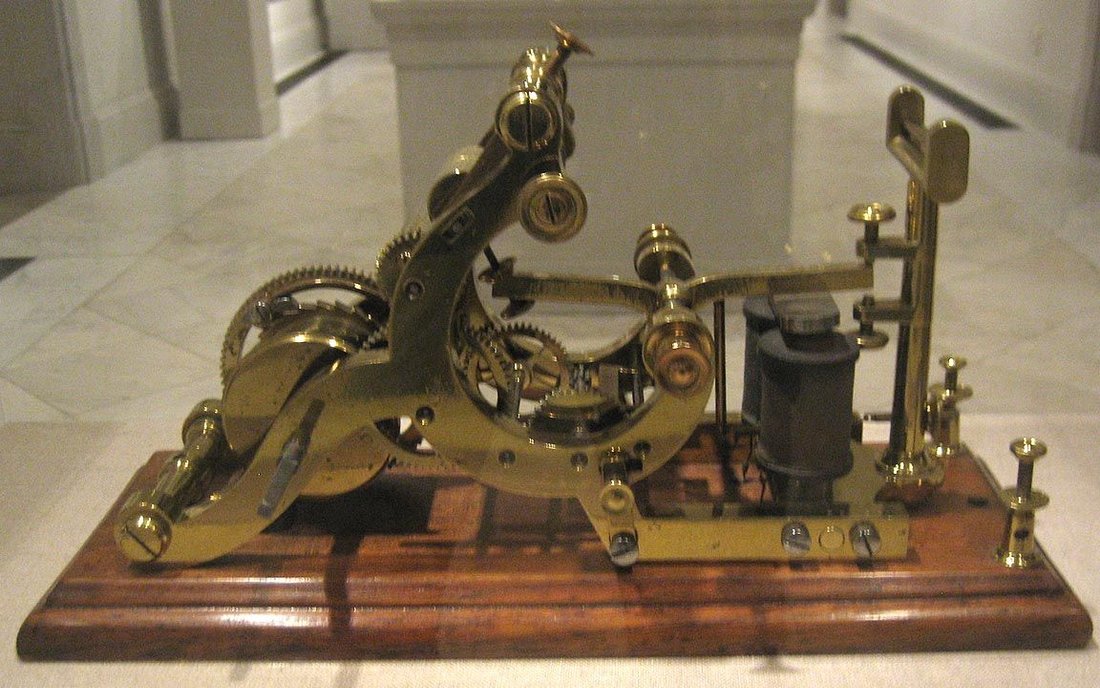
1.2 The simplest possible key
The classic first build is a hacksaw-blade key: a springy steel hacksaw blade (or a strip of clock spring, or a paint-can-lid strip) bolted at one end to a wood block so the free end floats above a contact. Press the free end, it touches the contact, the circuit closes; let go, the blade’s own springiness lifts it. Add a knob (a drawer pull, a wine cork, a 3D print) and you have a working straight key for the price of a bolt. A cootie (sideswiper) is nearly as easy — mount the blade horizontally with a contact on each side, and you can swing it left and right. The point of starting here is that it demystifies the whole family: once you’ve made a blade key, every fancy brass key in this sub-project is just the same idea executed beautifully.
1.3 The one wiring rule
Here is the single thing a homebrew key must get right, and it’s the only genuinely fiddly part (Figure 2): how many wires the plug needs.
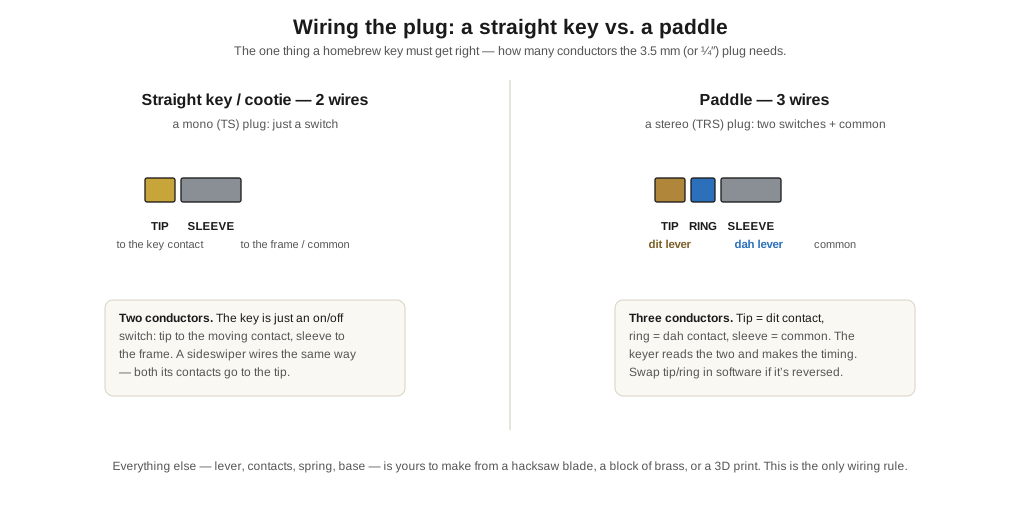
- A straight key or cootie is a single switch, so it needs two conductors — a mono (TS) plug: tip to the moving contact, sleeve to the frame/common. (A cootie’s two contacts both go to the tip.)
- A paddle is two switches, so it needs three conductors — a stereo (TRS) plug: tip = dit, ring = dah, sleeve = common. If the keyer sends dits where you meant dahs, you’ve swapped tip and ring — flip them (or swap in the keyer’s menu).
Get the plug right and the rest is metalwork.
1.4 Contacts: the part that actually matters
If any part of a homebrew key deserves care, it’s the contacts — the two little surfaces that touch to close the circuit — because they carry the wear and decide the feel. Your options, roughly best to most-improvised:
- Silver — the classic key-contact material: low resistance, resists the pitting that comes from tiny arcs, stays clean. Silver contact rivets are cheap and worth using.
- Brass — softer and it tarnishes (brass oxide is a poor conductor, so brass-on-brass contacts can get intermittent), but it’s everywhere and fine for a light-duty key you keep clean. Two brass screws with their tips filed flat make a perfectly usable contact pair.
- Tungsten / hardened points — overkill for a hand key (they matter where there’s real arcing), but they never wear.
- Salvaged contacts — the silver contacts off an old relay or contactor are a homebrewer’s treasure.
Keep the contact area small and the pressure firm, keep it clean, and avoid dissimilar-metal pairs that corrode. Contact bounce — the contacts chattering as they close — is rarely a problem at hand-key speeds, but a keyer’s electronic debounce cleans it up anyway.
1.5 Springs, base, and knob
- The spring returns the lever and sets how firm the key feels. A leaf spring (a bent strip of spring steel) is the simplest; a coil spring with an adjusting screw gives you tunable tension; and the premium trick, borrowed from the boutique paddles, is a pair of magnets for a smooth, fatigue-free return. Any of them works — pick what you can adjust.
- The base must be heavy and stable, because a light key skates around the desk when you send. Hardwood, a slab of brass or steel, a chunk of marble, or a 3D print filled with sand or lead shot — mass is the whole requirement. Rubber feet keep it from walking.
- The knob is pure ergonomics and pure fun: a drawer pull, a cabinet knob, a turned bit of wood or acrylic, a 3D print. It should fit your fingers.
Everything above is the straight-key end of the workshop. Volume 2 goes to the harder, more rewarding builds: homebrew paddles (from a clever hex-key trick to a machined aluminum block), how to pair a hand-made paddle with a keyer chip or a microcontroller, and building your own CW practice gear — including the little OLED trainer that listens to Morse and reads it back to you.
1.5.1 Sources (Vol 1)
- Homebrew-key technique (blade keys, contact materials, springs, bases) — the QRP/homebrew community (SolderSmoke, SKCC “build a key” resources, Instructables/hackaday homebrew-key write-ups); the physical principles cross-check against Keys & Keyers → Straight Keys & Hand Keys (anatomy, gap, spring).
- Plug wiring (mono TS for a key, stereo TRS tip=dit/ring=dah/sleeve=common for a paddle): standard keyer/rig conventions (ARRL; keyer manuals). Example build photos are collected homebrew-community images (credited generically per this project’s hobby-imagery policy).